
How to Bind a Neckline with Bias Binding: Step-by-Step Sewing Tutorial
Binding a neckline with bias binding is one of the most common ways to finish a raw neck edge. You’ll
Finding a zipper in the exact color and length you need isn’t always easy. You need a 6-inch (15 cm) zipper, but the store only has 8-inch or 12-inch (20 or 30 cm) ones — a familiar problem for anyone who sews. The good news: you can shorten a zipper yourself without compromising on color or quality. In this tutorial, we cover how to prepare a zipper before shortening it, and two reliable ways to finish the cut end.
Before shortening a zipper, you need to pre-shrink it — steam-press it first. This step is mandatory, not optional.
Here’s why it matters: the zipper tape (the fabric strip the zipper teeth are sewn onto) can shrink slightly the first time the finished garment is washed. If you skip pre-shrinking, the fabric around the zipper seam can pucker after that first wash, and the whole seam will look uneven. That’s why you always steam-press the zipper before cutting your fabric and sewing — never after.
Let’s look at two reliable methods for shortening a zipper: finishing the cut end with a scrap of fabric, or with a strip cut from the zipper tape itself.
This method works for most projects and is especially good when you want the cut end of the zipper to look neat and stay from fraying.
What you’ll need:
How to size your fabric scrap:
Step-by-step instructions:
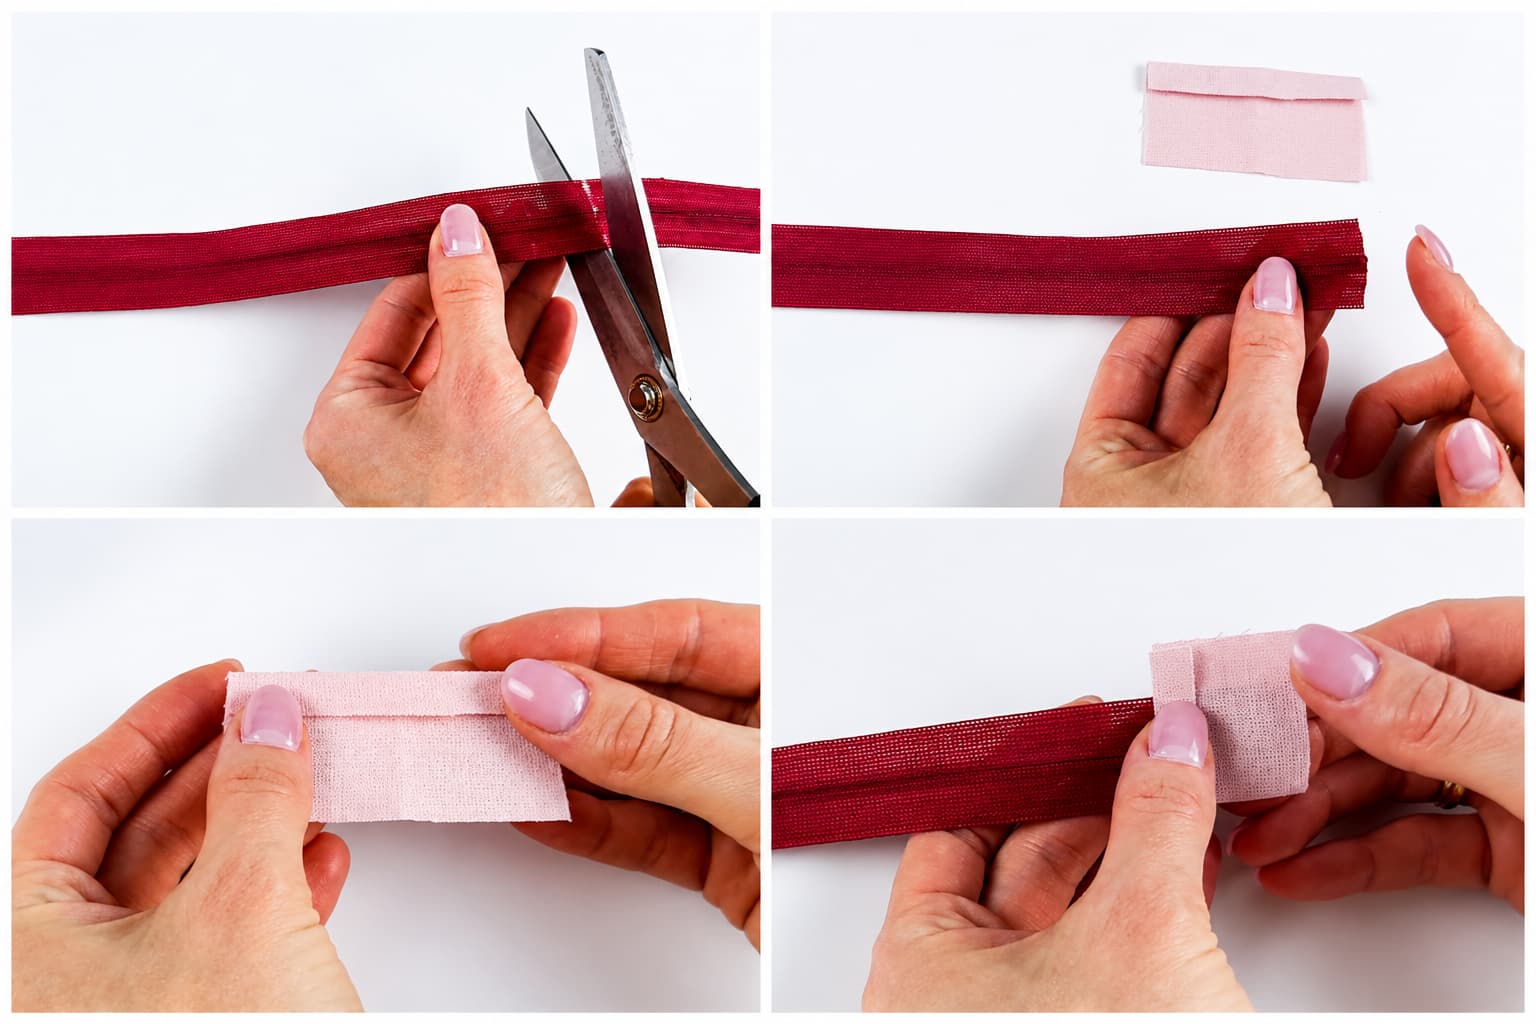
4. Stitch along the side, staying about 1 mm away from the zipper edge — be careful not to catch the zipper itself in the stitching, since you’ll need to turn this piece right-side out in the next step.
5. Turn the piece right-side out.
6. Stitch again to secure the fabric scrap to the zipper permanently.
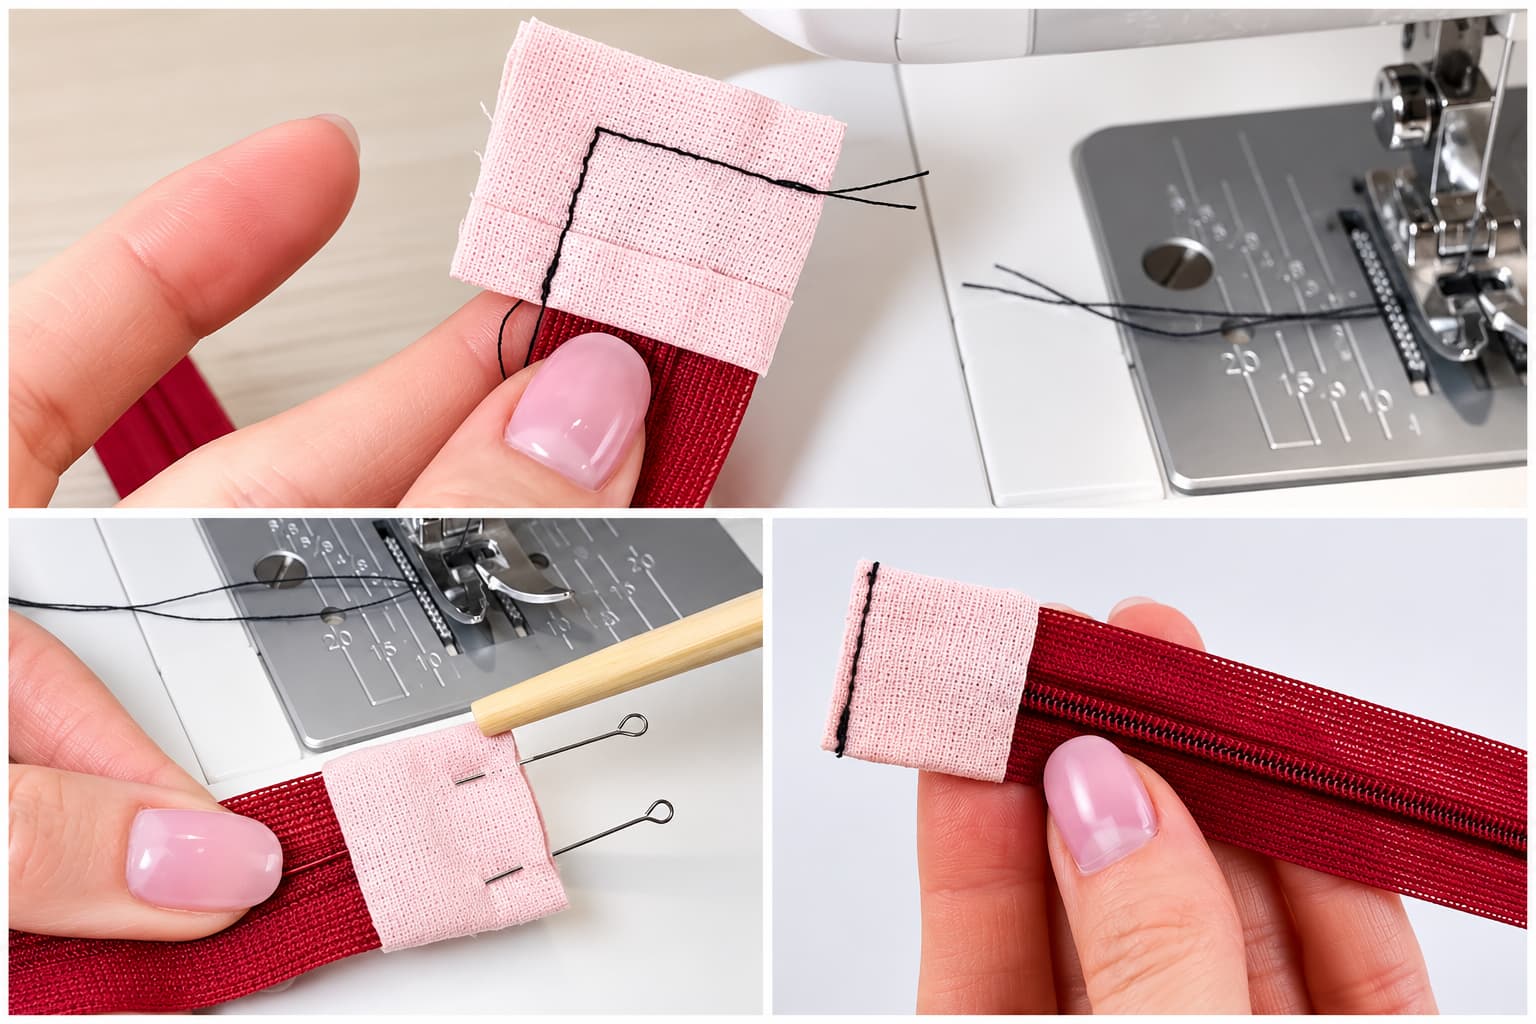
The result: the cut end of the zipper is fully enclosed in fabric, won’t fray, and won’t get in the way when you sew the zipper into your project.
A more resourceful option: instead of a separate fabric scrap, you use a strip of tape cut from the leftover end of the same zipper — nothing extra needed, and it’s a faster finish.
How to do it:
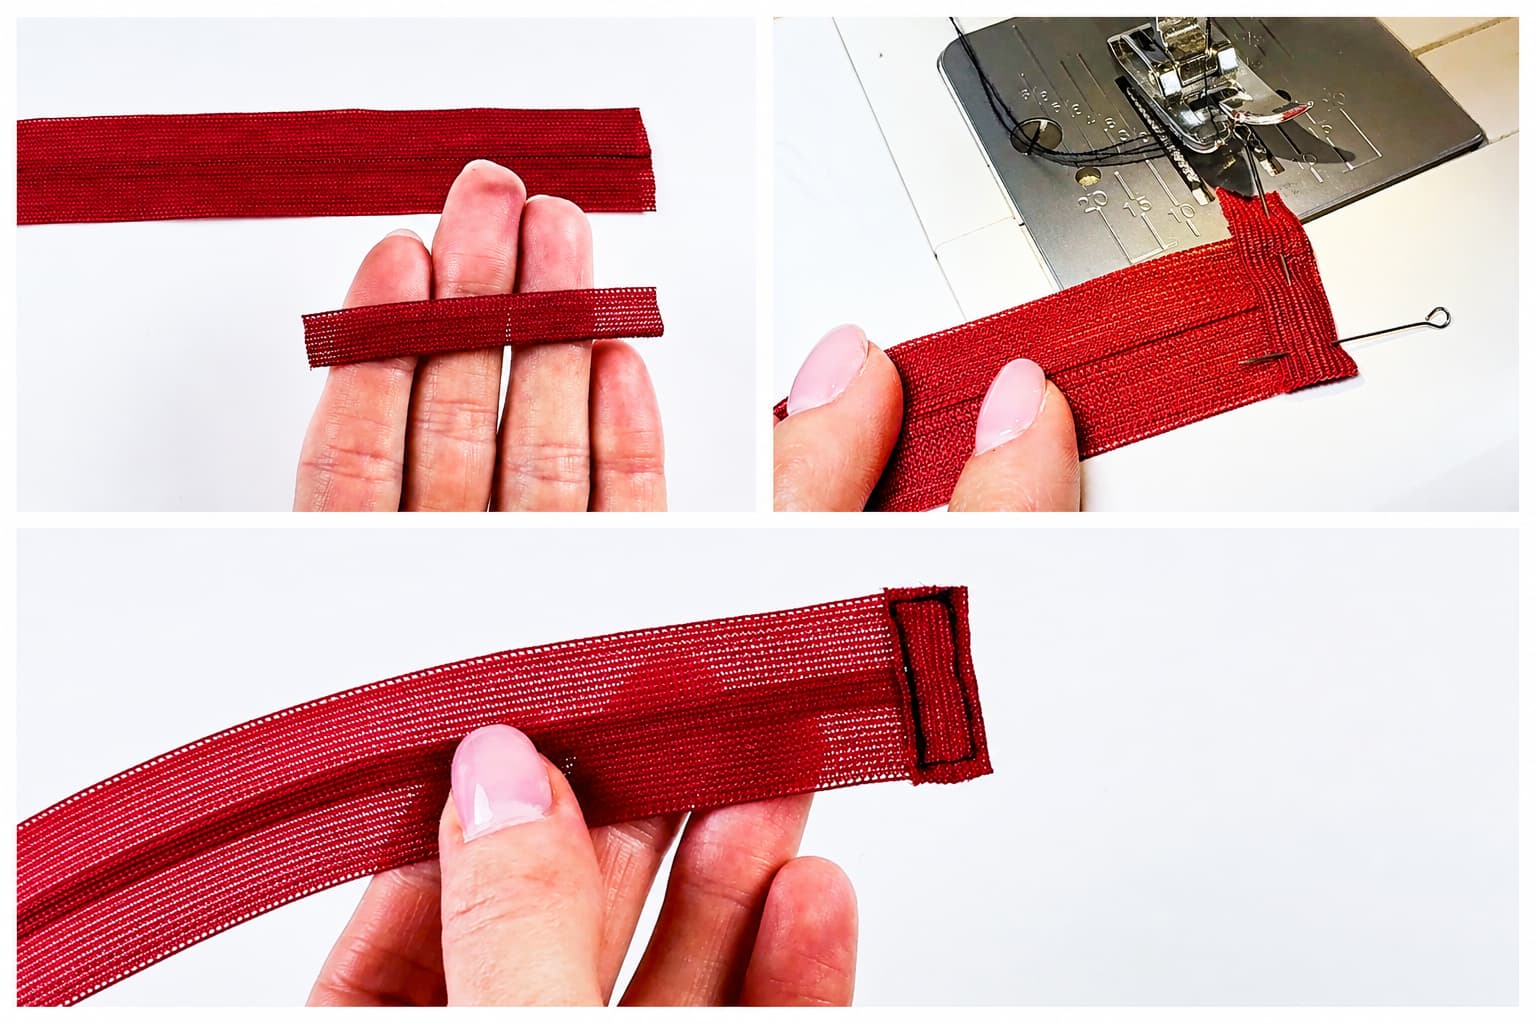
This method is especially handy when you don’t have a matching fabric scrap on hand — the tape color is already guaranteed to match the zipper.
No account yet?
Create an Account